

Pickleball, the paddle sport sweeping the nation, has captivated players of all ages with its engaging gameplay and social appeal. Whether you’re a seasoned competitor or a budding pickleball enthusiast, honing your skills is crucial for success on the court. Embark on a DIY project to create your pickleball practice wall, transforming any available space into a personal training ground.
Introduction
A pickleball practice wall offers a versatile and convenient platform for refining your strokes, mastering techniques, and enhancing your overall game. Whether you’re practicing volleys, drives, or dinks, a dedicated practice wall provides an unparalleled opportunity to focus on specific aspects of your game without the distractions of a competitive setting.
This article will show you how to make a pickleball practice wall in simple steps. Enhance your pickleball skills with the help of a practice wall, a rapidly growing training tool in popularity: master strategies and perfect techniques through this effective method.
Table of Contents
How to make a pickleball practice wall
Engage in targeted shot practice and endurance-building repetitive drills against the wall. Depending on your playing style and budget, tailor your choice between foam, plastic, or wood walls.
Enjoy solo practice sessions without requiring a partner, and all this at a cost much more affordable than other pickleball training equipment. Level up your game today with the versatile practice wall!
A pickleball practice wall is an excellent tool for players to enhance their skills and refine their techniques. It provides a consistent surface for hitting the ball and allows players to work on their shots, footwork, and strategies without needing a playing partner. Additionally, it’s a great way to stay engaged with the sport during solo practice sessions.
How much does it cost to build a pickleball practice wall?
Building a pickleball wall is inexpensive and can be completed for less than $100 if made from scratch. However, consider paying someone to build it if you need more clarification about your handyman abilities.
How Long Does A Pickleball Ball Last? Tips To Extend Its Lifespan
Required Material
- Plywood Sheets: Select high-quality plywood sheets to ensure durability and longevity for your practice wall.
- Pressure-Treated Lumber: Opt for pressure-treated lumber to resist decay and withstand various weather conditions.
- Wood Screws: Use wood screws to attach the plywood to the lumber frame securely.
- Hinges: Hinges will allow you to fold and unfold the practice wall for easy storage.
- Weatherproof Paint: Apply weatherproof paint to protect the plywood from the elements and add a splash of color.
- Pickleball: Remember to get a few pickleballs to start practicing as soon as your wall is ready.
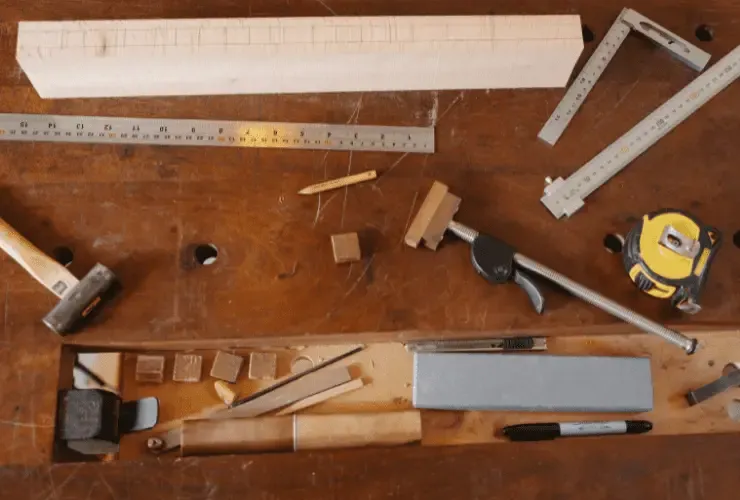
Tools:
- Circular Saw: A circular saw will help you accurately cut the plywood sheets and lumber.
- Screwdriver: You’ll need a screwdriver to drive in the wood screws during assembly.
- Measuring Tape: Ensure precise measurements with a measuring tape.
- Paintbrushes: Use paintbrushes to apply the weatherproof paint.
Choosing the wood
The ideal material for crafting a pickleball wall is plywood, with a minimum thickness of ¾ inch (2cm). This thickness provides the necessary strength for the wall to stand securely and ensures sufficient bounce-back resistance for the ball.
The most common plywood size is 5 feet by 5 feet (1.5 meters by 1.5 meters). You will want at least two plywood sheets to build the pickleball wall. However, utilizing just two sheets will produce a wall height of 5 feet (1.5 m), which is around 26 inches (66 cm) above the net height – a sufficient height for practice.
Aiming for a wall height of at least 6 feet (1.8 m) is advised for a better practicing experience. Achieving this height might entail having the plywood sheets custom-cut to the appropriate size—endeavor to minimize the number of sheets used while ensuring the desired height.
Chose the method
You have the option of creating two types of walls:
- A reinforced plywood screen.
- A strong structure is holding up a plywood screen.
In both scenarios, we will consider constructing a wall that is 10 feet (3 meters) wide and 6 feet (1.8 meters) tall.
Reinforced plywood screen
1: Join the sheets of plywood together.
To begin constructing the pickleball wall, follow these steps:
- Place the two plywood sheets connected flat on the ground.
- Place a 6 ft (1.8 m) two-by-four length along the joint where the two plywood panels meet.
- Along the length of the two-by-four, firmly screw it into the plywood.
- Make sure to alternate the screws and secure them to both sides of the joint.
- The two plywood sheets will be joined together successfully as a result.
- The screen’s outer edges should be strengthened
- Pick up two 6-foot (1.8 m) long pieces of two-by-four lumber.
- Put them parallel to the screen’s outer edges.
2: Reinforce the outside edges of the screen.
- Pick up two 6-foot (1.8 m) long pieces of two-by-four lumber.
- Put them parallel to the screen’s outer edges.
3: To reinforce the inside of the screen, follow these instructions:
- Pick up the remaining four two-by-four lengths.
- Place them parallel to the existing reinforcing lengths on the plywood.
- Ensure there are two lengths on each side.
- Make sure the reinforcing sizes are evenly spaced.
- Securely screw the two-by-fours onto the plywood.
- This will strengthen the inside of the screen.
4: Completing the front of the screen:
- Flip the entire board over so that the front side faces up.
- Apply wood putty to any uneven join parts to achieve a smooth surface.
- Use the putty to fill in any areas where the screws have created indentations in the wood.
- Allow the putty to dry completely.
- Once the putty is dry, paint the wall with two coats of clear polyurethane.
- This will provide a protective and polished finish to the pickleball wall.
Plywood screen on a solid frame
1. Create the outside edges of the frame.
- Arrange two 10 feet (3 meters) two-by-fours parallel on the ground with about 6 feet (1.8 meters) between them.
- Between the ends of the two 10 feet (3 m) two-by-fours on the ground, place one of the 5’5″ (1.6 m) lengths of two-by-four.
- The longer wood pieces are fastened to the ends of the shorter piece with screws.
- On the other end of the same long piece, carry out the same procedure with the second short two-by-four.
2. Creating the remaining frame
- To ensure consistent spacing along the length, attach the remaining 5’5″ (1.6 m) two-by-four to the same lengthy two-by-four.
- The frame is finished by attaching the second 10 feet (3 m) two-by-four length to the free ends of the shorter lengths.
3. The plywood sheets to the attached frame
- Place one sheet of plywood on the frame, ensuring the corners are square.
- Use screws to attach the plywood to the frame at the corners securely.
- Lay the second plywood sheet on the frame, aligning the center line flush and ensuring the corners are square.
- Screw the second sheet onto the frame at the corners to secure it.
- Further, attach the boards to the frame with screws around their edges.
- .You can attach each one along the two-by-four lengths close to the joint.
- A sturdy and complete pickleball wall will be ready for practice following these steps.
Read More: Pickleball Vs. Tennis: Which Sport Burns More Calories?
Things To Consider When Making A Pickleball Practice Wall
When selecting the ideal pickleball practice wall, making the right decisions can be challenging. Before settling on a specific wall, several crucial factors must be considered, including size, material, distance, and angle.
Select the Ideal Location
Finding the right location for your pickleball practice wall is crucial. Look for a spot with enough space to accommodate the wall and sufficient clearance for playing comfortably. Avoid areas with potential obstructions, and ensure the ground is even and smooth.
Size of the Wall:
The size of the wall is a fundamental consideration in your practice wall choice. Depending on your skill level and personal preferences, you can opt for a full-sized regulation court wall or a more compact, portable option.
Material of the Wall:
The wall’s performance during practice sessions is strongly impacted by the material used to build it. Complex surfaces tend to reflect the ball with greater power, while softer materials absorb some energy, resulting in less intense and rapid ball rebounds.
Distance of the Wall from You:
Measure the space before the wall to ensure it meets your practice needs. It’s vital to avoid selecting a wall that is too far away from you during practice.
Pickleball requires a minimum of 10 feet of clearance between players, so ensure enough room between you and the wall to avoid interference from other players while practicing.
The angle of the wall:
The angle of the wall is a critical factor that can significantly impact your performance on the court. The right wall angle can enhance shot deflection and provide diverse tips to practice various techniques effectively.
Maintenance and Care
It’s essential to perform regular maintenance To ensure the longevity of your pickleball practice wall. Keep the wall clean and free of debris to maintain its rebound quality. By properly caring for your practice wall, you’ll have a reliable training tool that will last years.
Paint the Wall
- Apply a coat of white PVA paint to cover the entire wall surface.
- To protect the backboard from sun damage and fading, use UV-resistant paint.
- This type of paint prevents color degradation, ensuring that your practice wall remains vibrant and visually appealing even after prolonged exposure to sunlight.

- Place a strip of thick painter’s tape or masking tape horizontally across the width of the wall. The strip marks the level of the net.
- Paint the entire wall with the color of your choice, typically blue or green, except for the area covered by the tape.
- Allow the paint to dry completely.
- Remove the tape slowly to show a distinct line indicating the net’s location.
- Now, you have a visible marker on the wall representing the net’s location, enhancing the realism and effectiveness of your pickleball practice sessions.
Install your Wall
Although it may have a slight angle, your pickleball wall will be robust enough to stand against the garage or basement wall. Attaching it to the wall is an option. This can be achieved using long masonry screws and raw bolts, providing secure support.
Alternatively, you can use some form of adhesive for attachment. Another option is to affix angle brackets to the back of the board, allowing it to stand independently, much like a pickleball rebound wall. This gives you flexibility in setting up and positioning the practice wall for optimal use during your training sessions.
Can you play Pickleball at Home?
Sometimes, your desire to play Pickleball is strong, but problems like long distances to courts, unfavorable weather, or the unavailability of partners can hinder your plans. A practice wall can be the perfect solution for playing Pickleball in such situations.
With a pickleball practice wall, you can enhance your game whenever possible, even without a partner. Setting it up in your backyard requires finding the right spot and investing a little effort, but it allows you to practice and hone your skills at your convenience.
Can I practice Pickleball against a wall?
Practicing Pickleball against a wall is a highly beneficial and popular method. Many individuals find it advantageous for enhancing hand-eye coordination, refining swing techniques, and developing a more assertive playing style without the pressure of scoring points.
Moreover, it is an excellent warm-up before an actual game, making it a valuable addition to your pickleball training routine.
Conclusion
Building a pickleball practice wall can significantly enhance your skills and elevate your game. Following our comprehensive guide, you can create a top-notch practice wall to be your perfect training partner.
Remember to choose high-quality materials, measure accurately, and weatherproof your wall to ensure longevity. Now, you have all the knowledge and instructions to start your pickleball practice wall project. So, roll up your sleeves, gather the materials, and embark on this exciting journey to improve your pickleball game.